Today we're taking a trip back to learning more about Lightroom! Specifically, how to sort, rate and label your photos as favorites to make it easy on you to find and edit only the photos you pick. Be sure to read my first article about importing and organizing your photos in Lightroom here! This will help you import correctly and make sure your library is clean and correct.
One of the greatest benefits of Lightroom is not only do you have powerful editing tools, but you can store, sort and organize all of your photos in ONE place. You don't have to use Bridge to organize, and Photoshop to edit. LIGHTROOM gives you an all-in-one option. This is why I love it.
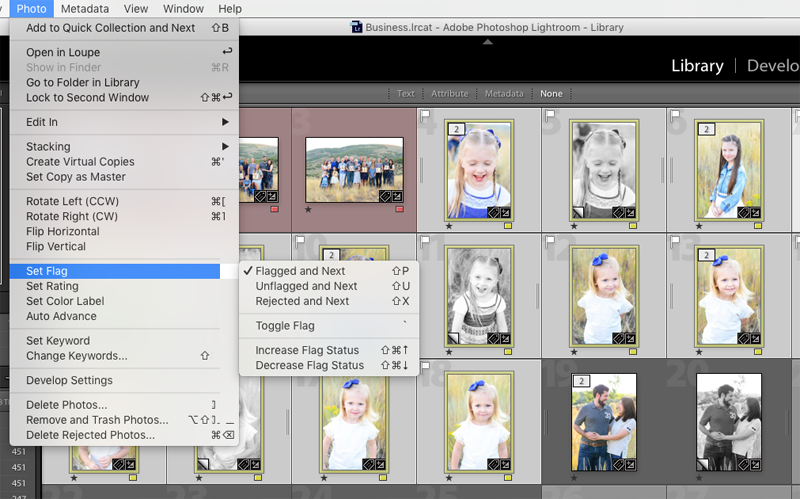
When I import a batch of photos through Lightroom, my next step is to sort through my photos and somehow label my favorites for further editing. Maybe you want to filter and label your photos by a certain location you were in, one specific event you imported or photos of only one of your kids. Lightroom makes this process SO simple! You can work with color labels, star ratings and flags. I like to flag the photos I want to edit. I'll go through all three processes with you and explain how to view ONLY those photos.
This image above shows my Library module, and you'll see that you can go to View-Sort- and choose how to view your photos based on this favorite system. Right now they are set to sort by Rating, but we can easily switch to your flagged Pick and Label Color.
How to Flag Photos in Lightroom
While clicking through photos, the shortcut to label a photo is the letter P. It will show you it's been flagged as a Pick.
If I don't like the photo and want to delete it eventually, you can hit X to reject the photo.
How to Star (Rate) Photos in Lightroom
This is simple to remember, hit numbers 1-5 to set the number of stars you want to label photos. For example, if I want a five star label I'll just press the number 5.
If you want to get rid of a rating, just hit 0 to reset the rating to zero.
How to set Color Labels in Lightroom
Color labels start with the number six; 6-Red, 7-Yellow, 8-Green, 9-Blue and so forth. Simple press the number associated with the color label you'd like. These color labels might be helpful to organize photos into certain groupings for your to do list. Maybe red means keep it, and yellow means you want to print that photo.


