Understanding Your Camera's Light Meter
Let's take it back to the basics and remember our three keys to making a good exposure: aperture, shutter speed and ISO. It is pretty complicated to look at a scene with just our eyes and determine what our exposure should be; what these settings need to be to make an image that is balanced as far as lighting is concerned. Luckily, we don't have to guess how to make a great exposure; we have an amazing tool built into our cameras to help us figure it all out - the light meter!
Cameras have built-in metering points that read the intensity of light throughout your scene. Light is recorded through your lens (TTL) to your sensor and your camera translates what your exposure will look like on your light meter. When you shoot on Auto, pressing the shutter release button half way determines the best exposure reading for that scene. You can choose your exposure by shooting in one of the creative modes (such as Manual, Aperture Priority or Shutter Priority). This is where using your exposure meter is crucial - it will tell you when you are in the ballpark of having a well-exposed image.
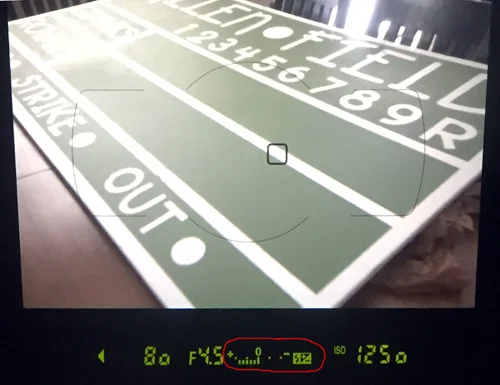
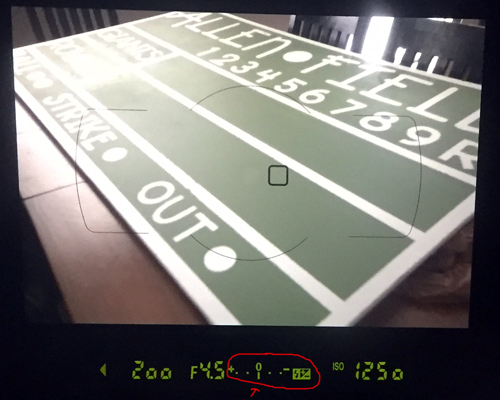
Your built-in light meter looks something like this:
You can see this when looking through your viewfinder, and on some cameras you can also see it on your LCD screen. When the tick mark (see red arrow) is lined up in the middle, your camera is telling you it is a good exposure. If these tick marks line up towards the positive numbers, your image will be too bright (overexposed). If they line up below the negative numbers, your image will be too dark (underexposed).
In these images below, you will see the light meter through my viewfinder. This image would be too bright. My ISO number is pretty high, letting in a lot of light. Think (+) as too much light.
This image below would be too dark. I dropped my ISO to 125, which will make my image very dark. Think (-) as not enough light.
When my tick marks line up with 0, I'll have a good exposure. I changed my shutter speed and my ISO to get the right combination.
Remember that your camera is giving you it's best opinion; it won't always be perfect. Sometimes your image will be a little too dark or too bright even if your meter is lined up at 0 (like my example in my previous post, tips for shooting in the snow). Use your meter as a reference point and then determine whether you need to make it brighter or darker. I tend to overexpose one or two stops in a lot of scenarios.
Switch your camera to Manual Mode to practice and watch the arrow on your exposure meter change. Try to get a combination of your aperture, shutter speed and ISO that will place your arrow closest to the middle of your exposure meter. If you want a blurry background, keep your f/stop number low and change your ISO and shutter speed until you get a good exposure. If you need a fast shutter speed to freeze motion but your image is dark, try a lower f/stop number or a higher ISO to let in more light. See how the settings work together to give you the best exposure! Practice, practice, practice!
White Balance - Why it is so Important
White Balance is a term that takes a back seat at times, but can be the game changer between your photos turning out beautiful or seriously yucky. I said it, yucky. Your house happens to be a little dark inside, and when you take a portrait of your baby (with your camera on auto), it looks like someone smeared a dirty orange peel over your lens. We all have them; these annoying orange photos, thanks to tungsten light!
SO you decided to head outside into the shade with your cute baby, but when you take the photo on Auto White Balance, the whole photo now looks blue. How can we correctly show the colors of light, that our eyes so easily adjust to, but our cameras sometimes don't?
WHITE BALANCE!
I promise you it will change your life. Listen up.
Every light source has within it, a certain color of light. White Balance refers to how accurate the colors in your photos show. It's easy to think of it as how warm or cool your images turn out. Some photos have a bad color cast to them, making white not look like true white. If we understand how to set our White Balance to match our lighting scenario, we can drag these yucky photos to the trash can and start getting images with great color and true whites.
Here's a chart that simply describes the White Balance settings on your camera:
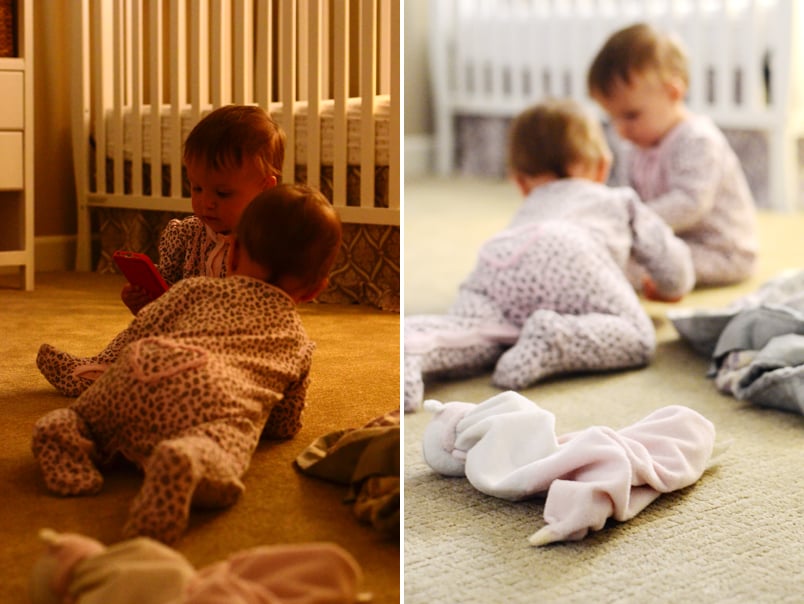
Let's get some examples going so you can see the difference. These two images below do all the talking. The one on the left? YUCK! The photo is a little dark to begin with, but the color cast from my auto white balance setting? It's terrible. The image on the right I shot using my custom white balance setting. My camera has the Kelvin scale, which I love and use about 90% of the time I shoot.
This example is what mommatography is all about - encouraging you to take your camera off auto and see how much better your images can get (even if you start by using different white balance settings).
The next two images were both shot outside in the snow. The first image was shot on Auto Mode, including Auto White Balance. The bottom image I shot on Manual Mode, with my Custom White Balance setting. Look how vibrant the colors are and how much more life the second image has than the first!
First image - Auto White Balance. Second image - Custom White Balance setting.
First image - Auto White Balance. Second image - Custom White Balance setting.
Refer to your camera manual for instructions on how to shoot using a custom white balance. Some of these methods include carrying around a gray card and shooting a photo of the gray card in the lighting scenario you are in. If you don't feel like trying to figure out how to use the custom setting, at least play around with the other preset white balance modes based on the chart I made above - if your image is too warm, use a cooler setting and vice versa. Your camera won't give you correct results in these modes every time, but they can be a step in the right direction.
If you want to start somewhere simple, try shooting with your Tungsten White Balance setting when you're inside with little or no natural light, and the warmth of the artificial light needs to be toned down. It is much easier to get your White Balance correct IN camera, while shooting, than try to fix it in any editing software after. Try and get it right in camera.
Remember that it takes a little practice to get used to but the results are WELL worth it! Good luck!
Depth of Field
Depth of Field (DOF) is the distance between the closest and farthest parts of your image that are sharp, or in focus. Before composing your photo you have to make a choice. Is it important that the scene before appears clear and sharp to soak up all the details? Do I want to hide distracting objects, messy walls, or bring my audience in on just the foreground? This varies from subject to subject and of course, with your personal preference. Depth of field is a term that relates directly with your aperture. Be sure to read and review my post about aperture.
I find that if I am shooting a large landscape scene, I want to achieve a sharp image and bring the entire scene to life. I usually photograph using a higher aperture (f/stop) somewhere between f/11-f/22 to get the details in the distant trees or mountains, clear.
This is the kind of scene (above) I want to use a deep DOF. It wouldn't look as good enlarged to a 30"x40" print if I shot with a shallow depth of field, such as f/4. I need a larger f/stop number to get those distant mountain ranges clear. I shot this with an aperture of f/16.
I shot this image above at about 7:00 in the morning when the sun was just rising. Since I wanted to shoot with a higher f/stop to get a deep depth of field (more in focus through my image) I knew I would need a longer shutter speed. This is where it is key to use a tripod. Shooting in dimmer lit scenarios means you need more light - to get more light in your image you either have to have a slower/longer shutter speed, a higher ISO number (review my post about ISO here) or open your aperture to a smaller f/stop number. I couldn't bend with my f/stop number and I wanted a low ISO setting (to avoid adding grain - remember the higher your ISO the more grainy your image will be). Using a tripod was the best solution by allowing me to use a slower shutter speed without having camera shake. I shot this image at f/16 and 1/4th of a second.
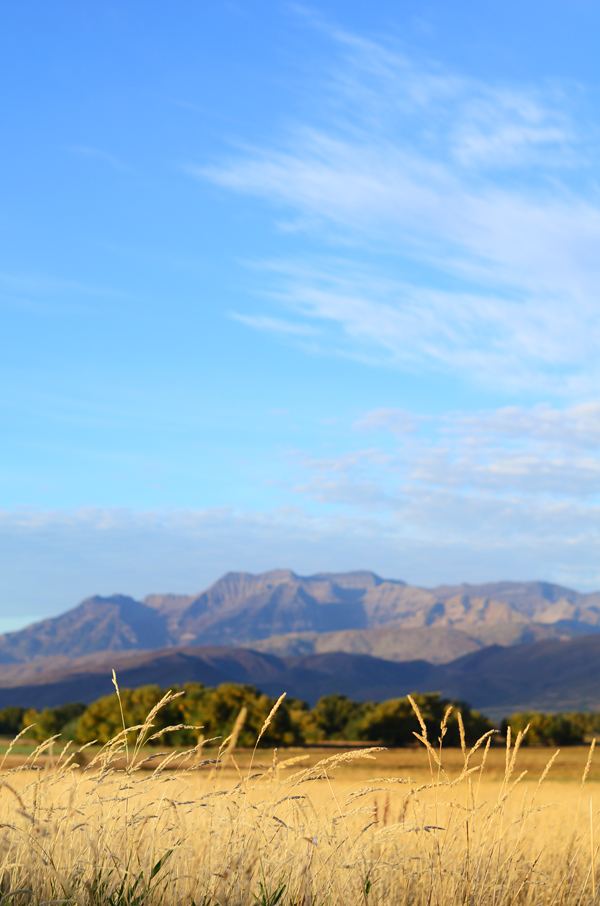
This is an example of using shallow depth of field with a landscape. Sometimes you'll want to focus on your foreground and blur the background; in this case I shot at f/3.5 so I can see some of the ridges in the mountains. If I shot at f/2.8 the mountain range might not be as recognizable, like I wanted it to be.
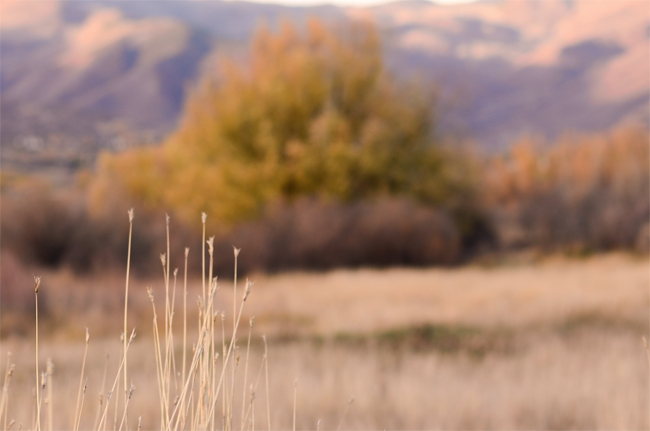
Here's another example of using a shallow depth of field for a landscape. Focusing on the branch instead of my whole scene adds a lot more interest in this shot.
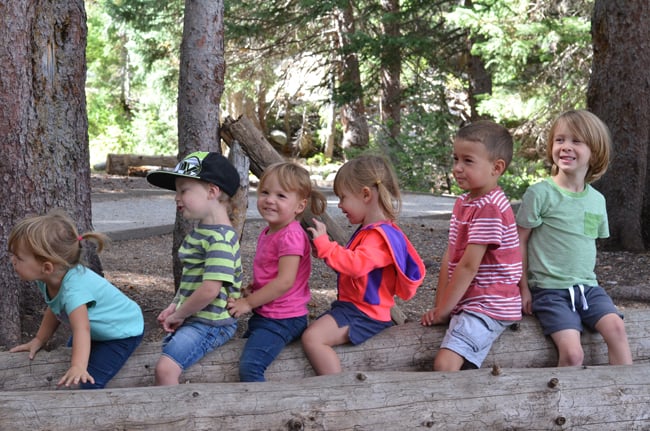
If I am photographing my kids and taking a simple portrait, I like to have just enough of their face in focus and blur the background. This ensures that the photo is all about them, not the greasy handprints on the wall behind their head, the dishes I left out on my kitchen sink, or dirty socks on the floor. You can take great portraits inside your own house and get that fun lifestyle element without showing too many details in the room behind your subject. You can also tell a fun story by using a shallow depth of field.
I also use a shallow DOF a lot with newborn photography; focusing on their little feet or hands. In this case, I want a shallow DOF with my aperture (f/stop) around f/2.8-f/4. This draws the eye to the certain part of the image or subject that is in focus and creates a softer feel. I love the way it highlights the little details of a newborn baby.
Brainstorm about what kind of images you want to take and practice using a shallow or deep depth of field to get the right mood and focus that you want in your photos. Hopefully when people refer to 'depth of field' you can understand what they mean a little better.
Understanding ISO!
If you've read my post on Learning How to Make a Good Exposure you'll remember that the three settings that determine your exposure are your ISO, along with Aperture and Shutter Speed. To make the most of your photos we need to understand how these three work together and in turn, create well-exposed images.
ISO is a numerical exposure index created by the International Standardization Organization (there's no need to remember that, but just in case you play a trivia game with ISO as a question, you now know the answer). What you need to know is that inside your camera you have a sensor where your images are recorded. Your sensor gathers the light available and with it, creates an image. ISO is basically how sensitive your camera's sensor is to light, or how it processes that light into signals.
HOW IT WORKS:
A higher ISO will allow you to take photos in low-lit situations. This will make your image BRIGHTER.
With a lower ISO you will need a well-lit scene in order to get a well-exposed image. This will make your image DARKER.
HOW IT EFFECTS IMAGE QUALITY:
The lower your ISO is (i.e. ISO 200) the higher your image quality will be.
The higher your ISO is (i.e. ISO 3200) the more 'digital-noise' or grain will show.
A higher ISO will let you shoot better exposures in darker settings, but as a trade off, you get more digital-noise. Digital-noise is when photos look grainy and less sharp or smooth.
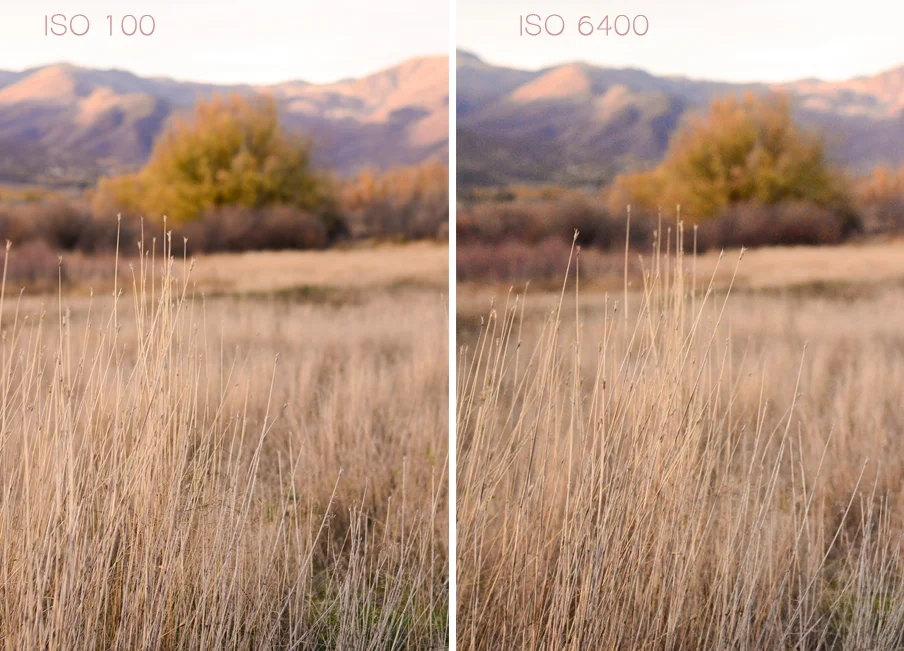
The cropped images below are zoomed into 66.7% so you can see the grain better. This is ISO 100.
This is ISO 6400. Although grainy, most DSLR camera sensors are improving when it comes to handling grain/noise at a higher ISO. This was outside before sunset with a decent amount of light, so the grain isn't as crazy as it would be if I were indoors in a dimly-lit setting.
Below you'll see another zoomed-in example of a landscape shot at ISO 100 and ISO 6400.
These photos of my fuzzy friend Lando show how a higher ISO number lets in more light. My shutter speed and aperture stayed the same, and I just increased my ISO.
Feel free to use my following examples as a quick guide:
If I am shooting outside with plenty of sunshine, I keep my ISO around the lowest setting (this is typically ISO 100).
If I am in the shade, I'll find myself shooting a little higher between ISO 200-400.
If I am indoors in a well-lit situation, I shoot somewhere between ISO 400-600.
When I shoot around sunset or dusk and my subject is dark, I'll push my ISO somewhere between ISO 800-3200 if I am holding my camera. If I am shooting a nice landscape, I will use a tripod and set a longer shutter speed to let in more light. This will allow me to keep a lower ISO for better quality.
I shoot around ISO 1600 or above if I am inside where it's dimly lit and I don't want to use my on camera flash.


