The Perfect Healthy Lunch - Quinoa Salad

It's still January and I got myself thinking that I need to find some really great recipes I can use for a quick but healthy lunch. I want to make a big batch of something that I can easily grab that will last me a few days through the week (not giving in and eating the leftover quesadilla from the lunch I made for little ones). Once lunchtime hits and my kids are fed, down for naps, and the house is quiet, the last thing I want to do is spend another thirty minutes in the kitchen making myself a healthy lunch. I want to relax! 

I found this recipe and thought it was the perfect place to start. It is such a great base to make my own variations depending on what I have in my fridge. I didn't have red peppers, so I roasted some red onions with my cauliflower instead and added some avocado slices on the side. I bet it was twice as good with the roasted peppers. I also cheated and used a pre-packaged garlic Quinoa and cooked it according to the stovetop instructions, since I didn't have any on hand. I also used a little less oil in the dressing. There are so many variations you could create with this salad! That's why I love it so much. It was delicious. 

Roasted Quinoa Salad Recipe - www.mommatography.com

Roasted Cauliflower Quinoa Salad:

Serves: 3 to 4 servings

1 medium head cauliflower
1 tablespoon olive oil
¼ teaspoon salt
2 red peppers (see note)
½ cup uncooked quinoa
¼ cup minced cilantro
¼ cup minced fresh parsley
2 tablespoons olive oil
3 tablespoons lime juice
2 tablespoons honey

Directions:
 

  • Preheat the oven to 425˚ F. Cut cauliflower into bite-size pieces and toss with 1 tablespoon olive oil and salt. Place on a baking tray along with whole red peppers (or any other vegetable you'd like to add). Roast and stir occasionally, until the cauliflower is caramelized and peppers charred (about 25-35 mins). Remove from oven and cool slightly. Remove the skin from the pepper and chop.

  • Rinse quinoa and combine with 1 cup water in a medium pot. Bring to a boil, reduce to a simmer, and cook for until water is almost fully absorbed, about 12-15 minutes. Remove from heat, cover and let sit until remaining water is absorbed, about 5 minutes.

  • Combine quinoa, cauliflower, and roasted red pepper in a bowl. Add cilantro and parsley to quinoa mixture.

  • To make dressing, combine olive oil, lime juice, and honey in a jar with liquid. Shake until combined. Pour on salad and toss until combined. Taste and add more salt as desired.

Recipe adapted from Naturally Ella. 

Roasted Quinoa Salad Recipe - Food Photography - www.mommatography.com

All I used photograph this dish was a small white plate, a fork, and an old white shelf I painted white! I used my 50mm lens and shot on f/2.8, 1/350 second, ISO 400 and a custom white balance. I stood on a tall stool to get the the composition for the first photo! 

Photographing food can be pretty simple. I love it. 

Pin the recipe for later!

Roasted Quinoa Salad & Food Photography Tips - www.mommatography.com

iPhone App Review - Whitagram

Whitagram is an awesome app I use all the time for Instagram. I love it because I can easily keep the exact size I want my image (for instance, a vertical image instead of square) and I get to add my own border or frame. Instagram still crops some of the edges of certain vertical images, and it doesn't allow for selecting a border around an image.

This is how Instagram cropped my image (left) compared to my framing in Whitagram (right):

Instagram vs. Whitagram - www.mommatography.com

I love having a clean white border to my images; it makes it look like a matted print. Using Whitagram also makes your Instagram feed look clean, showing a little more space between the photos (see image below). I like this look.

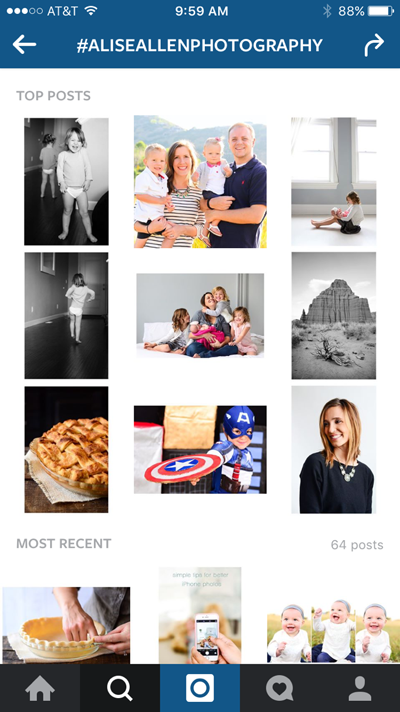
clean instagram feed

Let's get to it! This is Whitagram's home screen, where you choose to take an image with your camera or select one from your library. 

Whitagram App Review - www.mommatography.com

Once you bring it in from your library, you'll see this screen. This is what it looks like without a border. I'd like to add a white border around the top and the bottom, so I'll click the white square in the middle of the toolbar below the photo.

Whitagram App Review - www.mommatography.com

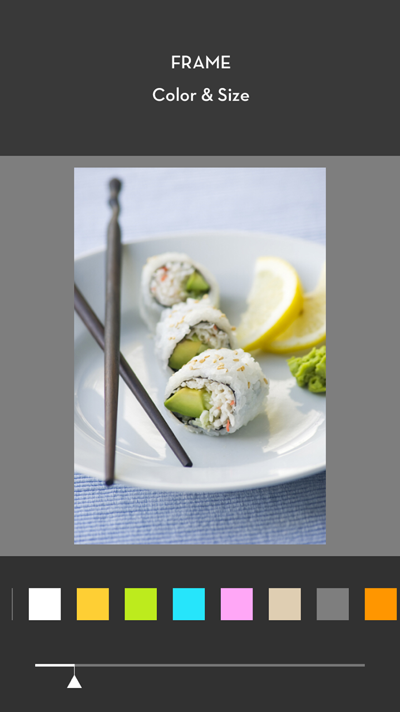
Choose your frame color and size by sliding the bottom slider to the right. I usually end up around 10-12 for the extra white space around my image.

Whitagram App Review - www.mommatography.com

If you'd like a different color of background, you can choose from all the colors below. I usually stick with white, but these can be fun to use as well.

Whitagram App Review - www.mommatography.com

To save those changes, just click anywhere on your image. The icon on the left  of the toolbar below your image (the three circles) will allow you to edit your image using Aviary. Here you can add filters (effects), change the brightness, saturation, sharpness, add text and more.  

clean instagram feed using whitagram

Once you have your final image, click save on the top and you'll come to an export screen that looks like this:

Whitagram App Review - www.mommatography.com

I always save mine in the Large file size. Then choose to save it to your camera roll or send it straight to Instagram or other apps like Twitter or Facebook.

Whitagram is a pretty awesome app that is easy to use and can really take Instagram photos to the next level!  


Don't Own a Wide Angle Lens? Try a Panorama!

Today I have a fun quick tip for shooting interiors, on a budget. It might take a while before you have a few extra lenses to add to that camera bag of yours. If you don't own a nice wide angle lens, here's a trick you can try! If you own an iPhone, or even some new DSLR cameras such as the Nikon D3300, you have a simple built-in panorama mode. Sometimes it's easy to forget that you can make fun panoramic images indoors as well. If you're careful and take your time, you can get a great panoramic shot of a room and make it look a lot bigger by fitting more of the room into your frame. 

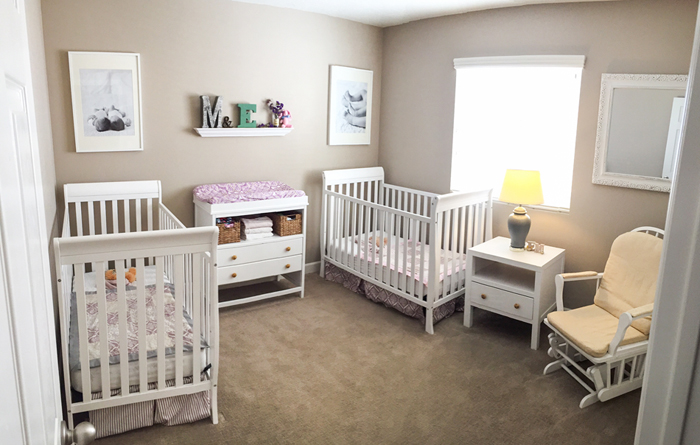
Here's an example from just my iPhone:

Using Panorama Mode for Wide Angle Interior Shots - www.mommatography.com

If you are using your iPhone for a panorama, make sure you move slowly and keep the arrow as close to the yellow line guide they give you. If you rush it or move too much, parts of your image won't align correctly (see the jagged window below). 

Using Panorama Mode for Wide Angle Interior Shots - www.mommatography.com

The quality won't be quite as good as your DSLR, but it's a nice quick tool you can use to fit more space in a photo. If you don't have the right lens or don't feel like taking out a tripod and stitching together your own panorama with multiple images using photoshop, try this! It's so easy. 


White Balance - Why it is so Important

White Balance is a term that takes a back seat at times, but can be the game changer between your photos turning out beautiful or seriously yucky. I said it, yucky. Your house happens to be a little dark inside, and when you take a portrait of your baby (with your camera on auto), it looks like someone smeared a dirty orange peel over your lens. We all have them; these annoying orange photos, thanks to tungsten light!

SO you decided to head outside into the shade with your cute baby, but when you take the photo on Auto White Balance, the whole photo now looks blue. How can we correctly show the colors of light, that our eyes so easily adjust to, but our cameras sometimes don't?

WHITE BALANCE!

I promise you it will change your life. Listen up. 

Every light source has within it, a certain color of light. White Balance refers to how accurate the colors in your photos show. It's easy to think of it as how warm or cool your images turn out. Some photos have a bad color cast to them, making white not look like true white. If we understand how to set our White Balance to match our lighting scenario, we can drag these yucky photos to the trash can and start getting images with great color and true whites.

Here's a chart that simply describes the White Balance settings on your camera:

Why White Balance is SO Important - www.mommatography.com

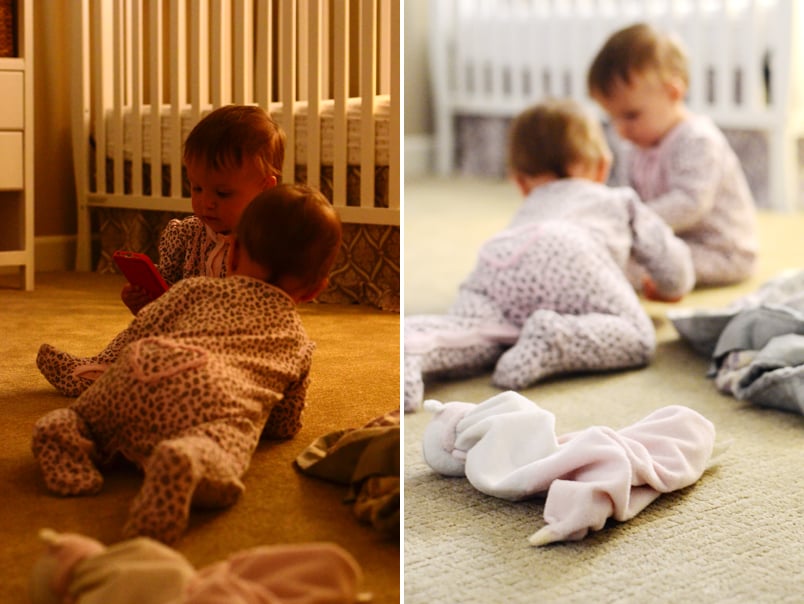
Let's get some examples going so you can see the difference. These two images below do all the talking. The one on the left? YUCK! The photo is a little dark to begin with, but the color cast from my auto white balance setting? It's terrible. The image on the right I shot using my custom white balance setting. My camera has the Kelvin scale, which I love and use about 90% of the time I shoot.

This example is what mommatography is all about - encouraging you to take your camera off auto and see how much better your images can get (even if you start by using different white balance settings). 

Why White Balance is so Important - www.mommatography.com

The next two images were both shot outside in the snow. The first image was shot on Auto Mode, including Auto White Balance. The bottom image I shot on Manual Mode, with my Custom White Balance setting. Look how vibrant the colors are and how much more life the second image has than the first! 

Why White Balance is so Important - www.mommatography.com

First image - Auto White Balance. Second image - Custom White Balance setting.

Why White Balance is so Important - www.mommatography.com

First image - Auto White Balance. Second image - Custom White Balance setting.

White Balance Examples

Refer to your camera manual for instructions on how to shoot using a custom white balance. Some of these methods include carrying around a gray card and shooting a photo of the gray card in the lighting scenario you are in. If you don't feel like trying to figure out how to use the custom setting, at least play around with the other preset white balance modes based on the chart I made above - if your image is too warm, use a cooler setting and vice versa. Your camera won't give you correct results in these modes every time, but they can be a step in the right direction.

If you want to start somewhere simple, try shooting with your Tungsten White Balance setting when you're inside with little or no natural light, and the warmth of the artificial light needs to be toned down. It is much easier to get your White Balance correct IN camera, while shooting, than try to fix it in any editing software after. Try and get it right in camera. 

Remember that it takes a little practice to get used to but the results are WELL worth it! Good luck!


Friday Feature - Rebekah Westover Photography

It's Feature Friday today and you should get excited. I have followed and admired the work of Rebekah Westover for a long time - her images of people are full of light, life and have such a natural beauty to them.  A few years ago, I had the wonderful opportunity to intern and work with Rebekah. I loved getting to know her and I learned so many things from her years of experience. It was really cool to realize that I didn't have to make enormous changes to try to improve my photography; Rebekah taught me so many little things that dramatically improved my images and the way I photograph. I am excited for Rebekah to share some of her advice with us that hopefully we can all learn from.


Hello there!

My name is Rebekah Westover and I have been a professional photographer for 10 years. I photograph weddings, families, and interiors. I have a wonderful husband and three beautiful children. I love interior design, reading, eating delicious food, watching Netflix, and I love photography. 

Q. What led you to pursue photography?

As a teenager, I loved photography. I always dreamed of becoming a photographer, but I never thought it would become a reality. Photography was just too fun to be a “real job”. In college I ditched my photography major and graduated with a degree in psychology. I worked at a residential treatment center right out of college and it wasn’t long before my co-workers were hiring me to shoot their engagement photos, bridal photos, and wedding photos. Part-time photography work continued until 2006 when my husband was laid off from his job.  We decided to take my business to the next level at this point. We officially opened my business Rebekah Westover Photography and never looked back. 

Interview with Rebekah Westover Photography - www.mommatography.com

Q. What is something you wish you would have known when you started out?

Something that I wish I would have known would be how LONG it takes for one to truly be proficient at their craft.  Learning how to create beautiful photos doesn’t happen overnight.  It takes years of hard work.  I remember starting out in wedding photography and comparing myself to established photographers and thinking, “I am terrible. This is terrible work. I will never be that good”. Patience and hard work are key when developing your talent.  Someone shouldn’t compare his or her first year of work with someone who has been shooting for decades. 

Interview with Rebekah Westover Photography - www.mommatography.com

Q. What are some fundamental things that helped you get to where you are now?

One thing that really helped me when I first started out was getting my weddings published.  I spent a lot of time and effort trying to get my photos noticed anywhere and everywhere.  Once my photos started appearing in local wedding magazines my name and business really started gaining momentum. 

Interview with Rebekah Westover Photography - www.mommatography.com

Q. How do you balance being a mom and a wedding photographer?

I am by no means perfect at this, but one of the things I have learned is that it’s okay for me to say NO to jobs I am not interested in or don’t have time for.  I used to say YES to every job.  I burned out quickly and was exhausted.  My time is limited so I have learned to be very selective of the jobs that I accept. 

I work from home a lot, so another thing that has been helpful for me is to set specific work hours and stick to them.  I used edit after my kids went to bed and would be awake and working until 3:00 a.m. every night.  It really took a toll on my health and well-being.  These days I work during the day while my kids are tended to. I have a set amount of hours each day to really buckle down and get my work done. This has really helped me to have a separation in my work and family life.  When I am working, I like to be fully tuned in to what I am working on. And when I am with my family, I like to be fully invested in that.  

Interview with Rebekah Westover Photography - www.mommatography.com
Tips and Interview with Rebekah Westover - www.mommatography.com

Q. A lot of us are taking pictures of kids, family events, and making a history of our lives; what is one tip you can share from your professional perspective to help us improve?
 
Just shoot, shoot, shoot, and more of it! You will improve leaps and bounds just by shooting frequently.  Also, analyze and study your photos afterwards.  What did you do wrong? What did you do right? What could you do better next time?  I used to keep a photography journal and after every shoot I would write out things that I struggled with and things I could improve on.  Also, learn how to shoot manually on your camera.  If you want to create the photos you have in your mind’s eye, you need to be able to control your camera. When you shoot in auto-modes your camera controls you!

Interview with Rebekah Westover Photography - www.mommatography.com

You can see more of Rebekah's work at www.rebekahwestover.com, follow her on Facebook or Instagram at @rebekahwestover