Lighting

Rome & Paris - Tips for Shooting Photos at Night

Buongiorno and bonjour! I am back! I took a small leave of absence for my very first trip to EUROPE (yay!), followed by making up time with the three little ones we left behind for almost two weeks. Needless to say, it has been quite an amazing month. I have always dreamed about walking along the streets in Europe. We spent five days in Rome and five days in Paris. It really was a dream come true, and I had the best time photographing while there. Talk about eye candy! Leaving both countries was hard to do, but October in Utah has been full of beautiful weather, fall leaves everywhere and fun activities with the kids. I needed some catch up time with them and it has been time well spent.

I hauled around my old film camera on our trip, my Hasselblad 500 C/M, which completely has my heart. Nothing can beat film in my mind and it made me pretty happy to shoot rolls of film again. In my next post I'll share with you more highlights from our trip and some of my favorites from my film camera! 

Today I am going to give you a handful of tips for getting great photographs at night time. Whether you are traveling, shooting something close to home or just want to experiment, long exposures at nighttime can be SO fun. With a few helpful tips you can get great photos. Some things just come to life when the bright mid-day sun has gone to bed.  

Tips for Shooting Photos at Night

  • Tip #1 - USE A TRIPOD! 

When you want to take a photo in dim lighting, at night or any dark setting, you'll most likely have to do a long exposure. This means you need a sllloowww shutter speed to let more light record on your camera's sensor to actually have a photograph show up. If it's dark and you try shooting at 1/60th of a second, you don't have a lot of light coming through your lens. What happens when you start shooting at slower shutter speeds? CAMERA SHAKE! MOTION BLUR! Any movement to the camera will cause your image to be blurry. You MUST have some kind of tripod or still, flat surface to place your camera.

This photo of the Trevi Fountain in Rome is a good example of showing motion blur (the water is blurred from the long exposure) but the building is completely sharp and in focus! I simply placed my tripod on a post to get this shot.

When traveling, I always want to make sure I have a tripod to rely on. I bought this fun little Pedco UltraPod II Lightweight Travel Tripod on Amazon for only $18.95, and it's been so worth it! The head swivels so I can easily change my composition and it even comes with a strap you can wrap around poles or trees, etc. It folds down really small and is worth every penny. I love not having to pack a huge bulky, heavy tripod on a trip. Check it out. 

  • Tip #2 - Use your timer!

I have found that if I'm using shutter speeds as long as one second or more, I can STILL have camera shake from my finger actually pressing my shutter release button to take the photo! I like to avoid the chance of a blurry image by using my camera's self-timer. That way I can guarantee I won't be touching or moving my camera at all and the photo should be pretty sharp. There wasn't much light around the Arch de Triomphe, so when I pressed my shutter release to take an 8 second photo, I could notice my slight camera shake. I had to set a timer to get it perfectly sharp! 

  • Tip # 3 - Select a Higher f/stop Number 

In the shot below of the Piazza Navona, you'll notice my lights turn into fun star shapes!

Everything I photographed on my trip at night was some kind of cool structure or scene; I wanted to be sure as much as I could see would be in focus and sharp, and I love the star effect. A higher f/stop number will allow this to happen. I shot this one at f/22. I usually shoot between f/8-f/22 for photos like this. The higher your f/stop number means you will need MORE light, hence the long exposures caused by the need for a long shutter speed. You'll also notice that the shot captures some motion blur lines from the people who walked by my camera while I took this photo. I think it is kind of fun and adds the life of the scene!

Go out at night time and give long exposures a try! It's a lot of fun to take long exposures at night. As for me, I am still having dreams at night of the food, culture and life in both Rome and Paris... I miss it so much already but am so grateful for the opportunity we had to be in two incredible places! 


Intro to Shooting Backlit - 5 Tips for Beautiful Backlit Photos

When I was interning with the lovely Rebekah Westover, it was always humorous to see how many people wondered why she was shooting into the sun; clients thought that the sun should be on them, not behind them. They would ask, "Won't we all be dark?" The answer is... you will LOVE what is about to happen! Just you wait and see! Rebekah then continued to work her magic to produce stunningly gorgeous images for her happy clients, like these images of hers below.

Have you seen those beautiful, naturally-lit portraits where the light adds a perfect warm glow behind the subject? The secret is to shoot backlit! When your subject has the sun on their faces, its harsh lighting and nobody likes to try and smile with the sun in their eyes. Shooting into the sun, even if it's bright outside, helps avoid this AND can make for stunning results. 

Check out my tips for getting great photos by shooting INTO the sun. 

Here are my 5 tips for shooting backlit!

1. Shoot in manual mode. It's SO tough to get the right exposure (or that dreamy glowing feel) when you're shooting on a subject on auto, with the sun behind them. Your camera will try and calculate for the bright, bright sun and your subject and your image will most likely turn out too dark. 

2. Spot-meter your subject. This will help you get the best exposure for your subject, not the contrasting values of your scene. You want your subject to be well exposed, and sometimes your background will go overexposed, but it will still be beautiful. For more about spot-metering and metering modes, click here. I also love shooting backlit indoors (shooting into the window light), like the photo below.

3. Use a lens-hood! When you have all that light coming into your lens, it helps to get more contrast with a lens hood; this can also help you to get just the right sun flares. Sun flare in certain photos can definitely add a great element but for some photos, it can block your subject too much or be overpowering. With a lens hood, even moving an inch can help you get the right look. 

4. Use a custom white-balance setting. I love cutting down my post-processing steps by shooting in Kelvin. I get to add a warmer temperature in-camera to get the right glow that I want to go for! Shooting on an auto-white balance setting isn't bad, but most of the time my images come out cooler than I'd like them to be. You can also shoot on the daylight setting, which might be warmer than your auto setting. Play around with your white balance settings to see what you like best! Read more about understanding white balance in my article here.

5. Try and find the perfect lighting, just before the sun sets, and see if you can get rim light to show around your subject. This is where you can see the outline of light around the subject. I love this look!

Shooting into the light or into the sun is my favorite way to shoot. I love how it creates such a beautiful glow around any subject! Practice shooting this way and I can promise you, you won't want to go back :)  


How to Light and Shoot a Perfect White Seamless Background

Today I'm going to write a post for those who are wanting to create a white seamless background. Whether you want a full-length portrait or a white space for product photography, a white seamless background will help eliminate a lot of hard work in photoshop and make your subject pop! This is a lot of fun for portraits of kids and I use it all the time when I have commercial and product shoots. 

For starters, if you're looking for a white backdrop, read my post about taking simple portraits (the LAST paragraph) to find an affordable setup. You can get a backdrop and stands for a good price on amazon. If you don't want to spend the money, I'm sure there are a lot of great DIY tutorials using a white sheet for a backdrop! 

My tutorial involves three lights; two to light your backdrop and one to light your subject. You can rent lighting kits from most camera stores and they are pretty easy to use. If you own your own lights and have been wanting to figure this out, hopefully I can help! 

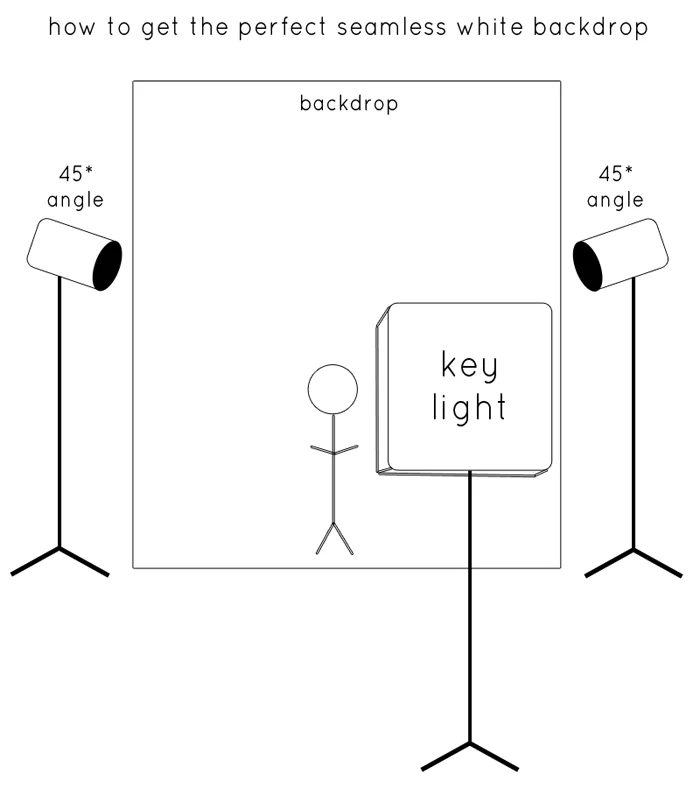
Here's a diagram of my setup: 


  • To get a white backdrop it's helpful to have TWO lights lighting it. Set up the two lights that shoot at about a 45 degree angle onto your backdrop. It's important to keep the light on your background but not on your subject. I use the general purpose reflector that attaches to my strobe to help direct the light (see below).

If it's too strong, I use something like black paper or tape as a grid to help diffuse the light that's shooting on the backdrop. IDEALLY, a Barndoor like this below, is the best way to control the light but I tend to make things work without buying a ton of equipment!  

  • For my key light, I like to use a big rectangle Softbox when shooting quick portraits. It keeps light soft and nice and it's easy to move around to light my whole subject. I usually place it so it is shining down on my subject at a slight angle. 

  • Next, you'll want to plug the lights in, turn them on and connect your camera to one of the strobes using a PC sync chord (usually included in most lighting kits). If your camera doesn't have a PC terminal where this connects, you can buy a simple adapter like this one. You can also ask the store if they rent those as part of the kit. I also use a wireless syncing remote that connects to my camera's hot shoe and the other half stays connected into my sync port on my strobe. This is a nice advantage because you can move anywhere you'd like and not worry about having your camera plugged into a chord. 

  • Set each strobe so that it will fire using the optical slave switch. This will automatically have it fire when the strobe you're connected to fires. I had three lights firing at the same time, while connected with the PC sync chord to only my key light.  

  • At this point, I have to play around with my exposure to get my subject lit just how I envisioned. It helps to keep your subject a few feet away from the backdrop, to avoid too much light spilling onto your subject. Also, most strobes match daylight, so set your white balance to the daylight setting to keep it easy. For my images I shot at f/5, 1/250 of a second and kept my ISO at 125. All three of my lights are strobes, meaning they fire for a split second. 

  • The last step is to play with the strength of each strobe until the light is how you want it. The two lights on your backdrop should be the same values to keep the backdrop evenly lit! Every kit is different, so it's trial and error to get the perfect value to light it just right. Play with the dials until it looks right. The same goes for your key light, or main light lighting your subject. Be careful not to light your subject too bright, just keep it nice and even.

Here's an example of how easy it is to overexpose with your key light. The top image is a little too hot; little Sophie starts blending into the background. By toning down my key light on the second image, I'm able to still keep the full detail in her fur. 

Strobe lights are fun to use because you can get great catch-lights in your subject's eyes. 

If you want to ask any questions visit my contact page and I can walk you through it! Try making a white backdrop and get some fun shots!

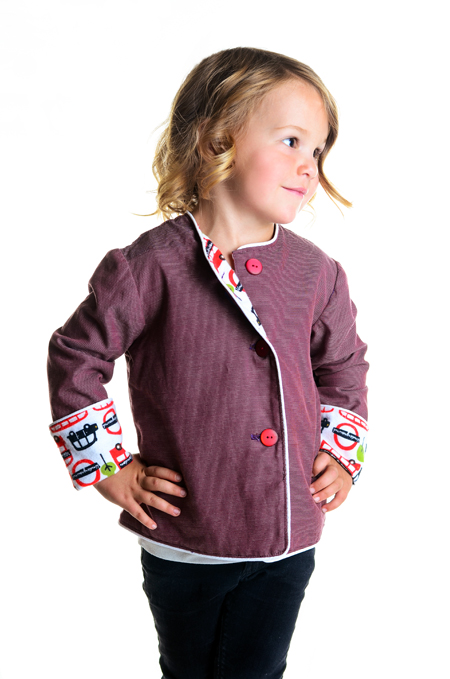
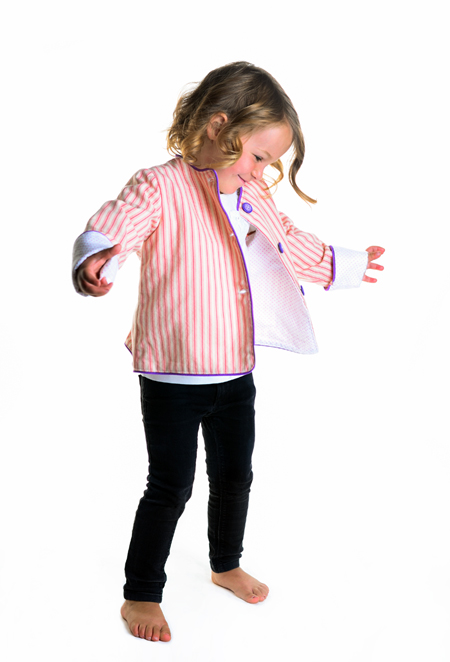
By the way, how CUTE are these dresses and jackets? Follow Chasing Vintage on Instagram or Facebook and watch for their website launch with the Chasing Ava children's clothing line coming soon!