Shutter Speed

Shutter Speed - How to Freeze Motion & Show Motion Blur

The Fourth of July is one of my favorite holidays. I am SO excited for the 4th this year! There is such a fun feeling living in a somewhat small town; I love driving with my windows down past beautiful green fields and mountain lakes, listening to all the patriotic country songs and thinking about just how LUCKY we are to live in America. I love the BBQ’s, parades, the rodeos, and the fireworks. 

I thought this would be a good week to learn more about good ol’ shutter speed! If you want to photograph cowboys trying for 8 seconds at the rodeo, freeze fun moments of your kiddos splashing in water, or capture the magic of fireworks, it all comes down to shutter speed. 

For those of you wanting to learn how to freeze motion or show motion blur, this is an easy tutorial to help you get the perfect shot at the perfect moment. 

How to Freeze Motion

To freeze motion in a photograph, you need to use a FAST shutter speed. Shutter speed gets quicker the higher the fraction is. Going from 1/60 to 1/250 to 1/500th of a second means your shutter speed is quicker. If you want to be sure that you freeze a subject running or jumping, using a shutter speed of somewhere between 1/500 - 1/1000th of a second is a good idea. 

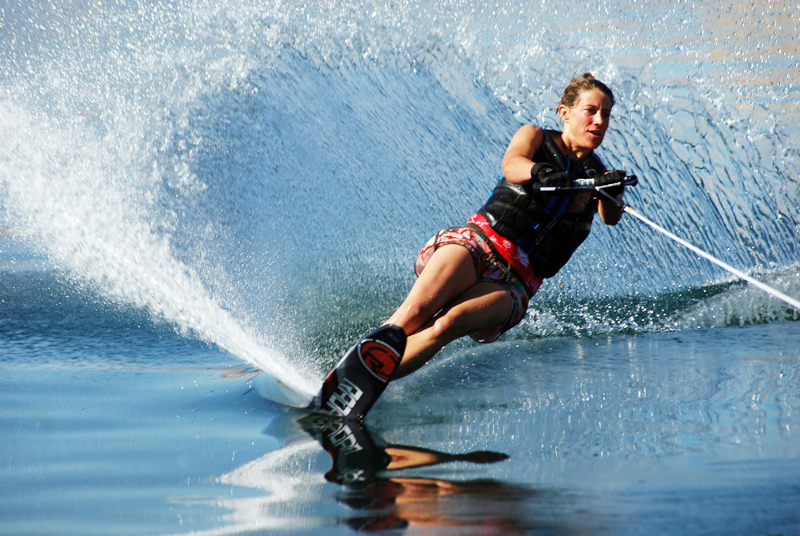
I love freezing motion at one of my favorite places on earth, Lake Powell. We spent many 4th of July's on that lake! It's a lot of fun to get good action shots of water sports. For the skier, I shot at 1/750, f/6.7 and my ISO was 110. 

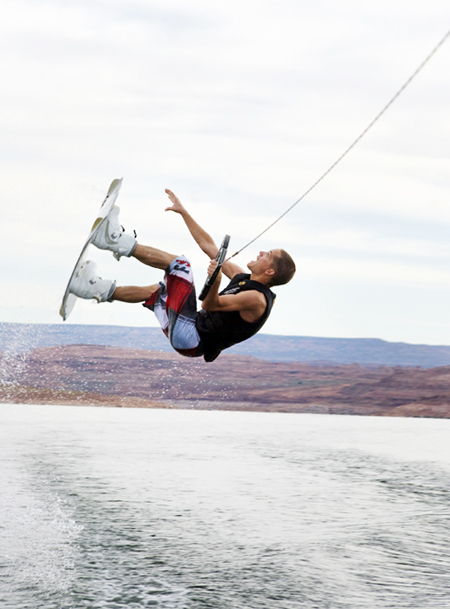
For the wakeboard shot, my settings were 1/500, f/8 and ISO 100. 

Wait a sec! That high of a shutter speed could be a problem right? Using a shutter speed that high means that you need A LOT of light. This can easily be done mid-day with the sun shining outside. If your lighting conditions aren’t bright enough, you’ll have to raise your ISO to a high ISO #, or open your aperture up as far is it can go (lower f/stop #). These are two keys to getting more light. Keep in mind that a lower f/stop will limit what is in focus and give you more background blur. 

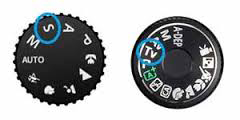
Are you bugged or overwhelmed by more manual settings talk? It's okay! I get it. Here’s another solution: change your camera settings to shoot in shutter priority. That way you can pick your shutter speed, and your camera will help you out with the rest. Phew. It's that easy! 

I shot this photo below at 1/1250 of a second and it's still not tack sharp! It's a fun shot but sometimes it's a lot of trial and error until you get the perfect shutter speed. 

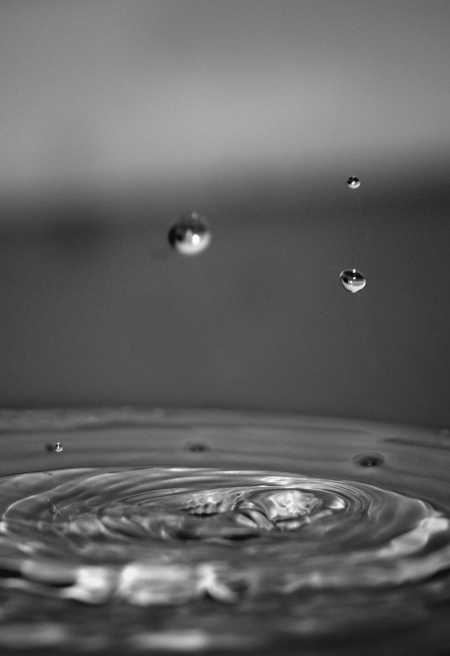
Here's another fun photo of freezing water in motion, taken at 1/600. 

How to Blur Motion

Blurring motion is the exact opposite idea. To show movement or motion blur, you’ll need a longer shutter speed. This will be a slower amount of time, such as keeping your shutter open for 1/4th of second, to perhaps three minutes or even longer. Your camera records what it sees in that amount of time, thus showing any movement. 

For this image below, these were my settings: 1/40, f/22, ISO 400. Because the ride was moving fast enough, 1/40 of a second was just long enough of a shutter speed to show the movement. Had I changed it to three seconds or longer, the shapes of the seats and the people would be a complete abstract blur. I chose this shutter speed because I wanted it to still be recognizable. 

First, you have to think about how fast your subject is moving. Second, think about how much light is in your scene. If you have a long shutter speed on a bright sunny day, your image will easily be overexposed (SUPER bright). If you only use a somewhat longer shutter speed at night (like 1/15th of second) you may not have enough light in your scene and it could be underexposed or DARK. 

If you try to show motion blur but your image is too bright, change your ISO to a LOWER # (less light) and your aperture to a HIGHER f/stop # (less light will enter your camera). If that’s too complicated to balance, once again switch to your SHUTTER PRIORITY and pick the longer shutter speed that you’d like to try out.

Two ways of blurring motion are:

1. Keeping your camera totally still and having your subject move.
2. Moving your camera (also can refer to the term panning, which is a fun trick we'll talk about later)!

To show your subject moving, it’s a great idea to use a tripod to ensure that you won’t shake your camera while taking the shot with a longer shutter speed. If you hand-hold your camera and try taking a two-second exposure, your photo will show camera shake from your hands moving. If you don’t have a tripod, you can try setting your camera on a table or anything stationary, set a self-timer and release the shutter. Even the motion of pressing your shutter release button can cause camera shake! 

I didn't have a tripod for this photo and you can see that his figure is a little fuzzy and blurry. It would have been much better result if I had a tripod. 

I shot this photo below at 1/10th of a second, f/4.8 and ISO 320. 

Using a tripod and a long shutter speed, you can get some fun images with sparklers by light painting; simply waving your hand around while the camera is taking the photo. 

For the shot below, I captured the movement of car lights by shooting at 1/10, f/3.5 and ISO 100 and of course, used a tripod so the rest of my image was clear. 

Use this holiday weekend to play around with your shutter speed and see what interesting images you can create! Be creative, have a tripod handy, remember SHUTTER PRIORITY and have fun! 


Shutter Speed 101

Now that you have reviewed and understand aperture, it is time to dive into shutter speed. If you missed the aperture post, take a look. It's important to understand because aperture and shutter speed go hand in hand. The shutter on your camera controls the amount of time that light hits your sensor, thus creating an exposure. It's kind of like a curtain. The slower your curtain opens and closes, the more light is let in. The quicker the shutter opens and closes, the less light enters. Your shutter speed not only effects your exposure (making it brighter or darker), it can show movement or freeze motion in a photograph. Shutter speed is measured in fractions of a second (i.e. 1/2  1/4  1/8  1/15  1/30  1/60  1/125  1/250).

Here's a little visual aid to help you understand shutter speed: 

learningshutterspeed

In the image below, we can see that the subjects are blurry. This happens when the shutter speed is slow, using a larger fraction. In this photo, I used 1/20 which made the people blur from movement. 

slow shutter speed

When using a tripod, slow shutter speeds (also called long exposures) can make for great landscapes. In this image, I used a tripod and shot before sunrise using a 30 second shutter speed. This showed the movement of the stars and let in more light from the sun rising, well before the sky was even light. We'll cover more about long exposures another time. 

long exposure

The image below is crisp and sharp, even though it is of a moving subject (riding quite fast in a triathlon, nonetheless). You can freeze or capture motion if you use a fast enough shutter speed, or a smaller fraction such as 1/800. I used 1/250 for this image, with a 50mm lens. 

freeze motion with shutter speed

When dealing with shutter speed, we also need to consider camera shake (blur from your hand holding your camera). A good rule of thumb when trying to avoid camera shake is to use a shutter speed that corresponds with the focal length of your lens. If you have a 200mm lens, you'll want to try and use a shutter speed of 1/250 or higher, to avoid camera shake. If you have a 50mm lens, try to shoot above 1/60. Using a tripod definitely helps to avoid camera shake, but these little tips will help you when a tripod isn't handy, because let's be honest, who wants to haul around a tripod everywhere? 

For a little review, think of this: aperture is the AMOUNT OF LIGHT that is let in your camera. Shutter speed is the AMOUNT OF TIME that the light is being let in! These settings are key to shooting on manual, which is absolutely, totally and completely awesome. You can do it.