VSCO Cam - Photography App for Better Instagram Photos

If you're searching for a fun app to make your Instagram photos look awesome, check out VSCO Cam. This app not only offers beautiful filters that resemble film for editing your photos, it also allows you to have more creative control while shooting. You are able to manually focus, control your white balance, shutter speed, aperture, ISO and use exposure compensation. Pretty sweet, right? Oh, and it's free. VSCO Cam has hardly any text on the interface, so navigating the controls can be a little confusing. Here's a quick rundown to get you started using VSCO Cam.

This is your main menu screen; when you click the menu button on the bottom left (stacked lines) you will get this screen. If you'd like to open your camera to take a photo, click the bottom left icon on this menu page (the box with the circle). I want to access my library and add photos to VSCO Cam so I click on library. 

VSCO Cam App Review - Make Your Instagram Photos Look Better - www.mommatography.com

To add photos into your VSCO Cam library from your camera, click the + button in the middle of the top menu (see below). 

VSCO Cam App Review - Make Your Instagram Photos Look Better - www.mommatography.com

You can select more than one at a time. Click the check mark at the bottom when you're done selecting your photos. 

VSCO Cam App Review - Make Your Instagram Photos Look Better - www.mommatography.com

If you want to take an image, this is what you'll see. The top left button turns on your control menu bar at the top of the screen. The top right button will flip your camera to the one on your screen. I have the grid tool turned on, which can help with composition.

VSCO Cam App Review - Make Your Instagram Photos Look Better - www.mommatography.com

In the image above you'll see the bottom left sunshine button opens more controls; setting your white balance, manual focus, ISO and your shutter speed. 

These two images below show how I can select my white balance using a Kelvin scale; the smaller the number (or closer to the left) the cooler it will be; the larger the number (to the right) the warmer your image will be. I use this scale on my Nikon for white balance and love this feature in VSCO Cam. 

VSCO Cam White Balance Control - Better Instagram Photos - www.mommatography.com

In the image below, you'll see some controls at the top of your viewfinder; the control menu button, setting a grid, low-light boost (white dot), white balance lock, and advanced-brightness control. The far right button switches your toolbar and background to be white or dark gray. 

VSCO Cam App Review - Make Your Instagram Photos Look Better - www.mommatography.com

To take an image, press the circle on the bottom. To access your images, click the image icon on the bottom right of your screen. This will take you back to your library. To edit an image, select the image and press the button on the left (see toolbar below - it looks like sliders). 

VSCO Cam App Review - Make Your Instagram Photos Look Better - www.mommatography.com

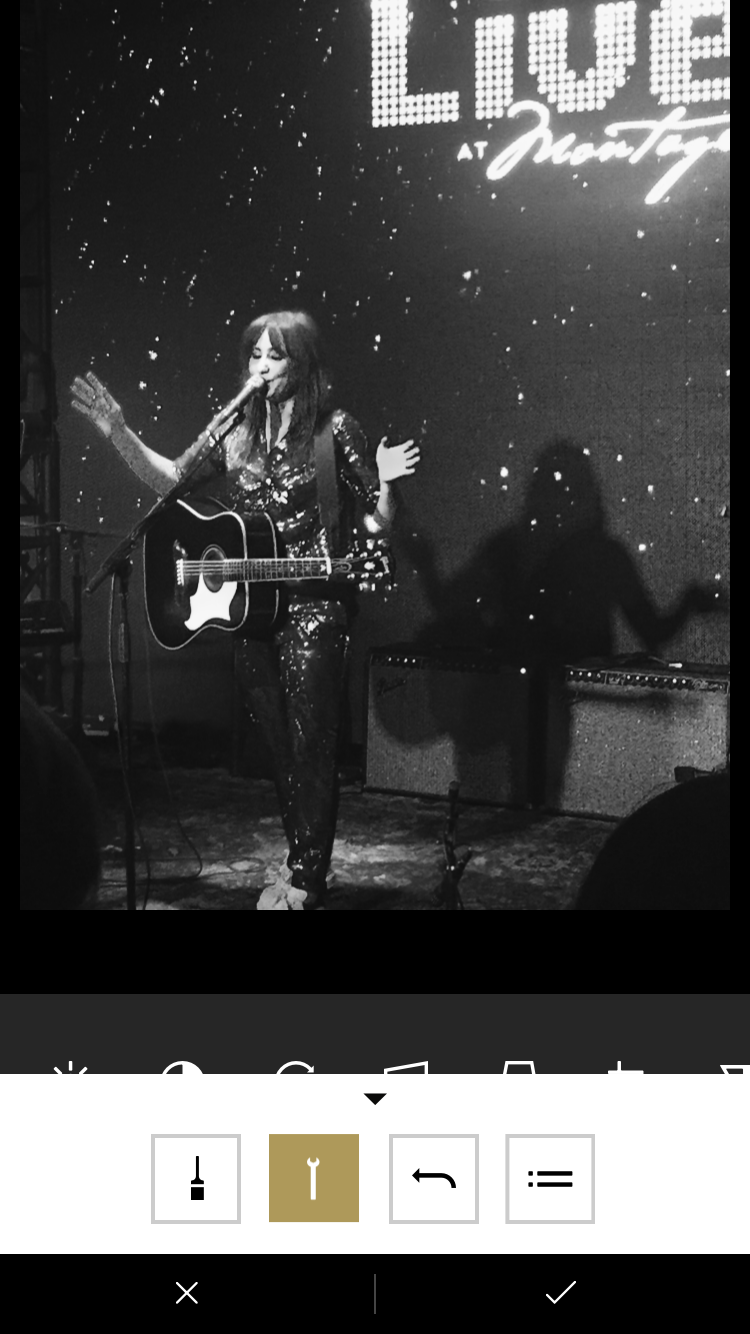
To add a filter to the image, click the paint brush and scroll through the filters. You can click the filter twice to select the strength that the filter will be applied, just like Instagram. Click the wrench icon to edit your image; brightness, contrast, straighten, crop, saturation, skin tone, and much more. 

VSCO Cam App Review - Make Your Instagram Photos Look Better - www.mommatography.com

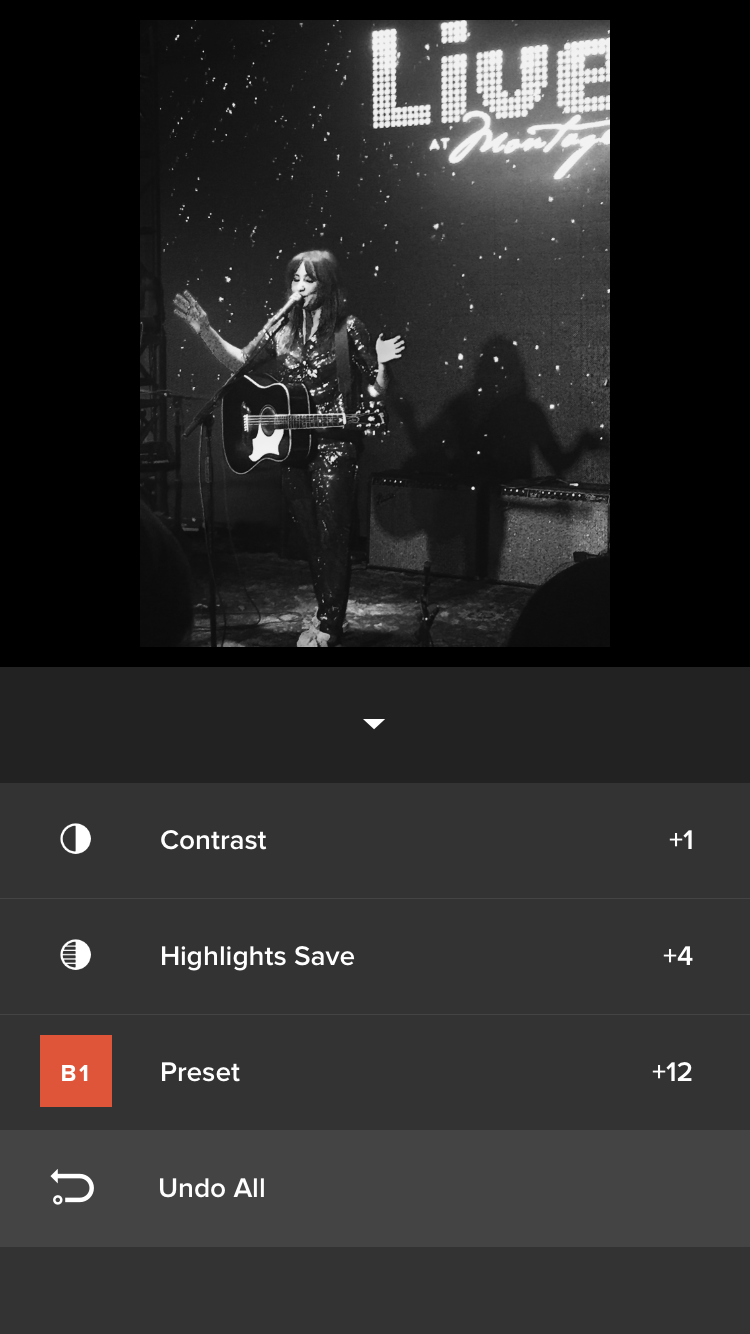
The button to the right of the wrench is an Undo button. The far right button acts like Photoshop layers. If you made an edit earlier on that you want to undo, you simply click this to alter the edit you made or delete it completely without losing all of the changes you made to your image! The image below shows an example of what the layers look like. 

VSCO Cam App Review - Make Your Instagram Photos Look Better - www.mommatography.com

Once you've finished editing your image and you're back on your library screen, click the dotted circle button (see below - far right button) to save or share your image to social media. 

vsco

This is your exporting screen. 

VSCO Cam App Review - Make Your Instagram Photos Look Better - www.mommatography.com

VSCO Cam also allows you to create a profile and browse the work of other users, like Instagram. There are many photo-editing apps out there but VSCO Cam is easily one of my favorites! Some say it is a "more artistic and curated version of Instagram". Plus, being able to have more camera controls on an iPhone is pretty fun. 

Check it out and give it a try!

Exposure Compensation - Easily Make Your Photos Brighter!

I'm going to let you in on a little secret. If you are overwhelmed by changing so many settings at one time, struggling to remember how f/stop numbers alter the look of your image, or you keep taking pictures that are too dark or too bright... have no fear! Exposure compensation will be your new best friend AND you don't have to remember your Aperture, ISO and Shutter Speed all at once to get your image right. All you have to do is press one button, and scroll. Sound pretty interesting? Does it sound too good to be true? 

It's not! I promise!

First, take a look at your camera and find this: 

Exposure Compensation - www.mommatography.com

Here's an example of where the exposure compensation button is located on a Canon camera (left) and a Nikon camera (right). 

Exposure Compensation - www.mommatography.com

Source

This exposure compensation works as a sliding number scale which will make your image brighter or darker depending on which direction you scroll. On my Nikon, I simply hold down the button and scroll with my thumb (the rear wheel) to change it. See my example below:

Exposure Compensation - www.mommatography.com

When you slide it to the negative numbers, it darkens your image. If you slide it towards the positive numbers, it will add more light. Pretty simple, right?? In the example below you will see how the photo on the left is darker by one stop, the photo on the right is brighter by one stop of light. 

Exposure Compensation Explained - www.mommatography.com

Here is what my exposure compensation dial looks like through my viewfinder:

Exposure Compensation - www.mommatography.com

For a good place to start, give this a try. I oftentimes find myself wanting a certain f/stop number, so I'd prefer to be in control of my aperture. Try switching to Aperture Priority Mode (A or Av) and shoot your scene with the f/stop you'd like. If it is too dark, use your exposure compensation to add more light, by scrolling to the positive numbers, until you get the result you want. This is a great way to practice without shooting all out manual and stressing too much!

Have fun trying out your new tool to quickly change your exposure!  

Pin it for later!

How to Easily Brighten Your Images With One Simple Step - www.mommatography.com
 

Metering Modes Explained

As a follow up to my previous post, Understanding Your Light Meter, I am going to go over Metering Modes! Metering will evaluate the amount of light and dark areas in your image and help you get the correct exposure for your subject. 

Your DSLR camera is equipped with a few different modes that will measure and determine how to get the best exposure, based on which setting you choose. Learning how to choose which part of your scene is most important and getting an accurate exposure for your subject will help you have more creative control with your photography!

The most common metering modes include:

1. Spot Metering

2. Center-Weighted Metering

3. Matrix (or Evaluative) Metering

SPOT METERING

Spot metering allows the photographer to choose the exact spot in your frame you want to expose for (using your selected focus point). This is a very accurate way to meter, but the area is very small so you have to be precise about what you want the camera to meter from your scene. This mode is awesome when your main subject, or your focal point, is a lot brighter or darker than the rest of the surroundings! It is also great for subjects that are backlit. I love that I can use this mode to meter subjects that are off-center, using a manually selected focus point. 

PARTIAL METERING (CANON)

Partial metering works the same way spot metering works, but the size of the area is a little larger. 

CENTER-WEIGHTED METERING

This mode allows for a larger metering area, which is fixed in the center of the frame. Although it takes a little information from the edges of your frame into account for the exposure, the priority is given to the center of your viewfinder. It is helpful for scenes where you want to expose for a subject in the middle of the frame, not worrying too much about the lighting behind or around your subject matter. Think of it as a mode that falls in-between evaluative and spot metering. On some cameras you can choose how large you want this area to be. Check your camera's manual for more information about how to change the settings.

EVALUATIVE/MATRIX METERING

This mode is considered a 'default' or 'auto' mode. This will measure the light in the entire frame of your camera's viewfinder and determine the average exposure for your scene. This mode works well when the scene you are photographing is evenly-lit. It is also helpful for landscapes. 

Here's a cheat sheet to know what the metering mode icons look like on your camera. Changing your metering mode is different for every camera; refer to your manual if you need help changing your setting.

Metering Modes Explained - www.mommatography.com

This will also help you visualize what each metering mode covers in your viewfinder. 

Metering Modes Explained - www.mommatography.com

source

I personally use spot metering most frequently. This gives me full control of focusing and metering for my subject and I find that it works the best for me! Try shooting the same scene using each metering mode and see if you can notice the difference.

Keep in mind that your camera does the best it can to average light and dark and some images STILL might be darker or brighter than you'd like them to be. This is where exposure compensation can come in handy, and we will cover that on Thursday!


Understanding Your Camera's Light Meter

Let's take it back to the basics and remember our three keys to making a good exposure: aperture, shutter speed and ISO. It is pretty complicated to look at a scene with just our eyes and determine what our exposure should be; what these settings need to be to make an image that is balanced as far as lighting is concerned. Luckily, we don't have to guess how to make a great exposure; we have an amazing tool built into our cameras to help us figure it all out - the light meter!

Cameras have built-in metering points that read the intensity of light throughout your scene. Light is recorded through your lens (TTL) to your sensor and your camera translates what your exposure will look like on your light meter. When you shoot on Auto, pressing the shutter release button half way determines the best exposure reading for that scene. You can choose your exposure by shooting in one of the creative modes (such as Manual, Aperture Priority or Shutter Priority). This is where using your exposure meter is crucial - it will tell you when you are in the ballpark of having a well-exposed image.

Your built-in light meter looks something like this:  

Understanding Your Exposure Meter - www.mommatography.com

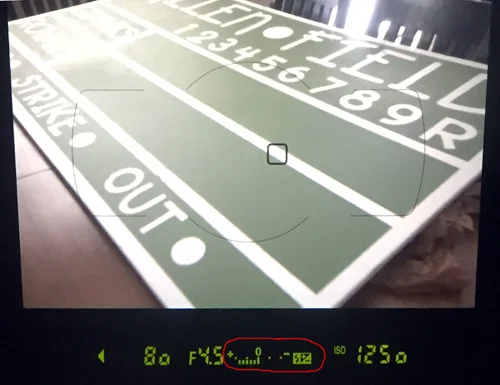
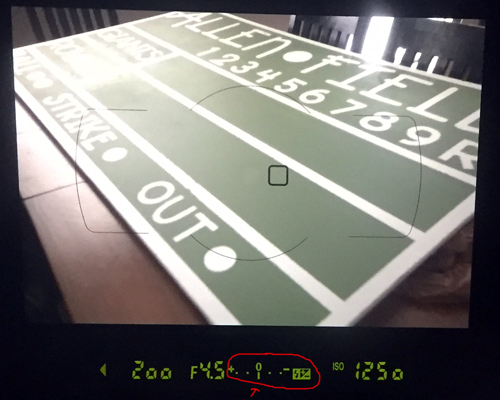
You can see this when looking through your viewfinder, and on some cameras you can also see it on your LCD screen. When the tick mark (see red arrow) is lined up in the middle, your camera is telling you it is a good exposure. If these tick marks line up towards the positive numbers, your image will be too bright (overexposed). If they line up below the negative numbers, your image will be too dark (underexposed).

In these images below, you will see the light meter through my viewfinder. This image would be too bright. My ISO number is pretty high, letting in a lot of light. Think (+) as too much light.

Understanding Your Exposure Meter - Overexposed - www.mommatography.com

This image below would be too dark. I dropped my ISO to 125, which will make my image very dark. Think (-) as not enough light.

Understanding Your Exposure Meter - Underexposed - www.mommatography.com

When my tick marks line up with 0, I'll have a good exposure. I changed my shutter speed and my ISO to get the right combination. 

Understanding Your Exposure Meter - Good Exposure - www.mommatography.com

Remember that your camera is giving you it's best opinion; it won't always be perfect. Sometimes your image will be a little too dark or too bright even if your meter is lined up at 0 (like my example in my previous post, tips for shooting in the snow). Use your meter as a reference point and then determine whether you need to make it brighter or darker. I tend to overexpose one or two stops in a lot of scenarios. 

Switch your camera to Manual Mode to practice and watch the arrow on your exposure meter change. Try to get a combination of your aperture, shutter speed and ISO that will place your arrow closest to the middle of your exposure meter. If you want a blurry background, keep your f/stop number low and change your ISO and shutter speed until you get a good exposure. If you need a fast shutter speed to freeze motion but your image is dark, try a lower f/stop number or a higher ISO to let in more light. See how the settings work together to give you the best exposure! Practice, practice, practice! 


6 Tips for Shooting Fun Portraits in the Snow

We have had some amazing snow falling in Utah this winter (they don't call it the greatest snow on earth for nothing) and we are loving it. For those of you who get the chance to play in all this white stuff - try taking some fun photos in the snow! I've got a few tips for shooting portraits in the snow. Snow can make things tricky sometimes. Here are a few pointers to ensure you make the most of your photos outside in the winter. 

SIX TIPS FOR TAKING PORTRAITS IN THE SNOW

1. TAKE YOUR CAMERA OFF AUTO! This is one of my MAIN goals for you, a major point of my whole blog - to get you exploring different camera settings and becoming familiar with shooting manual. Just take a glance at the two photos below. Can you guess which one was taken on Auto?? 

Tips for Taking Fun Portraits in the Snow - www.mommatography.com

Not this one. 

Tips for Taking Fun Portraits in the Snow (don't shoot on auto!) - www.mommatography.com

This one was shot on Auto!

Look how murky it is! The brightness of snow can be overwhelming to your camera and the light meter inside it, resulting in images that are way too dark when shooting on Auto. Be brave, switch it to manual, keep an eye on your light meter and pick your own exposure. Your images will be ten times better if you practice shooting on Manual Mode. 

Five Tips for Fun Portraits in the Snow - www.mommatography.com

2. Slightly overexpose your image. Snow will look cleaner and brighter if you shoot a little brighter than what your camera tells you is the right exposure. Don't go too far to where you completely blow out the snow or lose all detail in the white areas of your image. This can be tricky, especially if the light is changing due to partly cloudy skies. 

I made that mistake in this photo below - the sun peeked through the clouds a little and it made my exposure brighter than I wanted it to be. 

Tips for Taking Fun Portraits in the Snow (don't overexpose too much) - www.mommatography.com

This leads to my next tip!

3. Shoot in RAW format. If you are questioning your ability to make a good exposure, and don't want to risk anything, turn your camera file setting to shoot in RAW, or RAW + JPEG. This will give you the file that has all the information you need to bring back detail in your snow, just in case you do lose details in your crazy bright snowy scene. If you have editing software such as Photoshop, you can tone those areas down when you edit your photos.

Tips for Taking Fun Portraits in the Snow - www.mommatography.com

4. Use your HISTOGRAM. Most digital cameras and for sure DSLR cameras have a histogram. On the back of your camera when you preview your image using your playback menu, you can find and read a histogram for each of your images (check your instruction manual on how to display your histogram). On my Nikon, I simply press my up and down arrows. This is graph/chart that will SHOW YOU your where your shadows or dark areas, mid-tones and highlights or bright areas are. In the image below you can see my histogram (red highlighted area) and see that my values are spread pretty even across the histogram (the peak favors the right side because it's a bright image). 

histogram reading - www.mommatography.com

If there is a gap on the left side of your chart, it means you are losing some detail in your highlights. See the image below. 

histogram reading - www.mommatography.com

Let this work as a guide to see what is happening with your exposure. I will give a more detailed post about histograms soon. 

Tips for Taking Fun Portraits in the Snow - www.mommatography.com

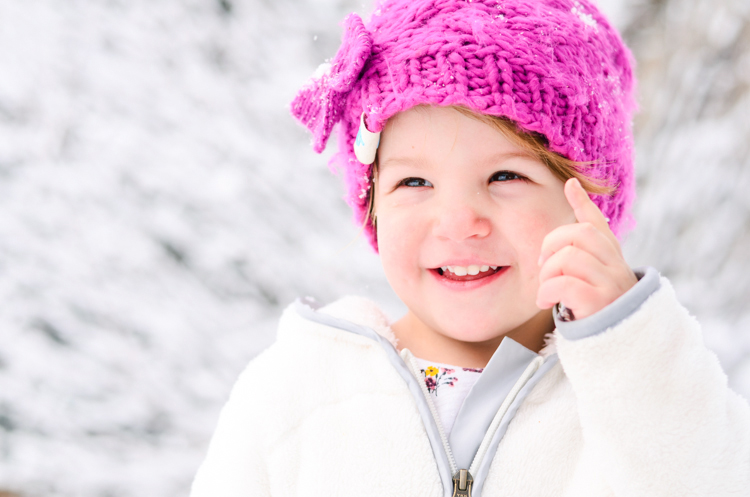
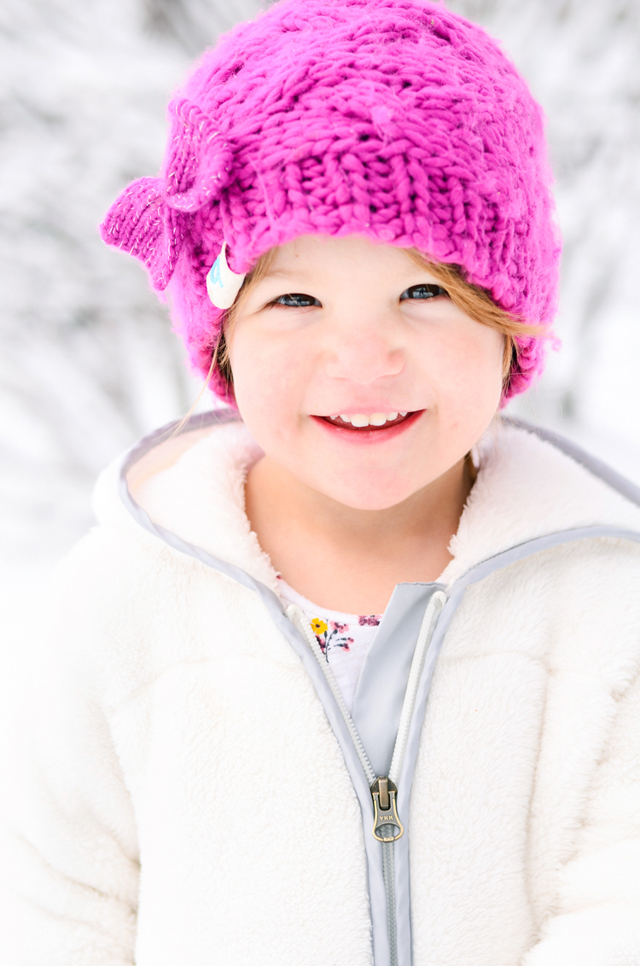
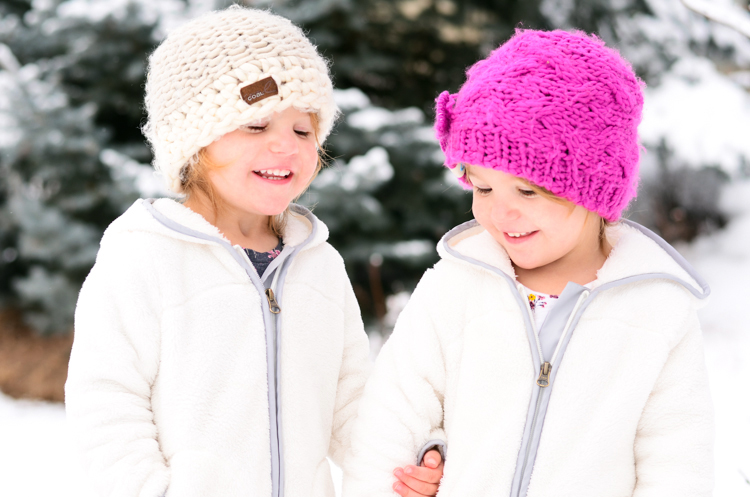
5. Try using a shallow depth of field. I love shooting with a lower Aperture number (f/stop) to get the snowflakes to show around my subject. I shot these at f/2.8 and f/3.2 to get that effect. I also made sure that my shutter speed was at least 1/250th of a second to freeze motion. These girls are constantly wiggling, jumping and laughing when they get out in the snow. To get crisp images and freeze motion, the faster the shutter speed the better. I shot these ones at 1/640th of a second. 

Tips for Taking Fun Portraits in the Snow - www.mommatography.com

6. Try something fun, like shooting out of focus and see what happens. I just so happened to focus on the snow falling instead of her face and ended up loving the result (image below on the left). If you're photographing kids, don't  tell them to say cheese. Just let them play and explore and you'll get some great moments. For more tips about photographing kids, read my article here

Tips for Taking Fun Portraits in the Snow - www.mommatography.com

Next time it snows, take your camera outside and try shooting some fun photos!